Get tutorial Hesh. Thanks for this.
The 00 is looking great by the way

| Official Luthiers Forum! http://www-.luthiersforum.com/forum/ |
|
| Bias Tape Side Supports (Pics) http://www-.luthiersforum.com/forum/viewtopic.php?f=10102&t=9045 |
Page 1 of 2 |
| Author: | Rod True [ Sat Oct 28, 2006 1:35 am ] |
| Post subject: | |
Get tutorial Hesh. Thanks for this. The 00 is looking great by the way
|
|
| Author: | Andy Zimmerman [ Sat Oct 28, 2006 3:04 am ] |
| Post subject: | |
Thanks for the thread!!! I bought about 5 colors of bias and am about to use it for the 1st time Andy World Champion St.Louis Cardinals
|
|
| Author: | peterm [ Sat Oct 28, 2006 3:06 am ] |
| Post subject: | |
Hesh, thanks for the pics. Highly informative.... BTW, crazy zoot! 
|
|
| Author: | Peter J [ Sat Oct 28, 2006 6:03 am ] |
| Post subject: | |
Hesh, I've started using the bias tape also. Same brand, ironed flat and glued in with fish glue; soaked in the same manner but the glue is a bit thicker and dries crystalline similar to HHG. I then cover with a coat of 2 lb cut shellac to seal and protect the glue. Here is my latest Yellow Cedar & Spruce flamenco with the tape applied: 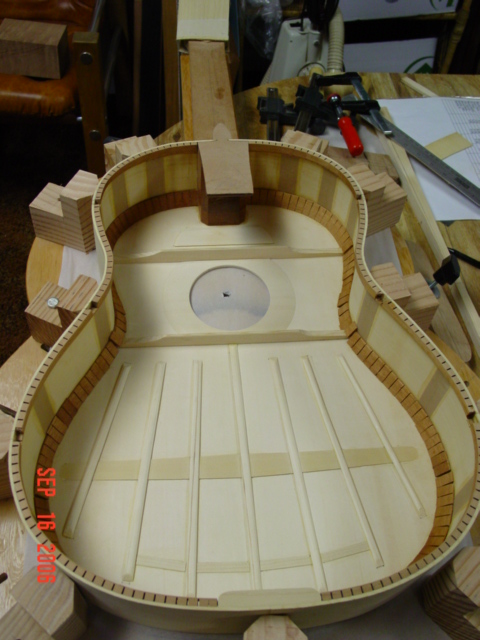
|
|
| Author: | CarltonM [ Sat Oct 28, 2006 6:36 am ] |
| Post subject: | |
Very nicely presented, Hesh.
Thanks, too, to Todd and Peter for your enhancements. BTW, Peter, nice looking guitar! Interesting workboard arrangement, too. Got any naked photos of it, so we can see how it works? |
|
| Author: | Alan Carruth [ Sat Oct 28, 2006 10:58 am ] |
| Post subject: | |
I install side tapes pretty much the same way, but I use HHG. About four years ago I did a little experiment with tapes and glues. I cut equal width pieces of broken sides from mahogany, padauk, Indian rosewood, and persimmon. I used both HHG and Titebond to glue tapes on them, using bias selvedge tapes and nylon twill, and I also made ‘null’ samples with no tape. I shellacked the tapes as I usually do. I made up a long lever, with a pair of dowel supports about 1” apart on the bench underneath, and a dowel between the lever and the test piece halfway between the supports. I then slid a can full of marbles down the lever with each sample in place, and recorded the location of the weight when the piece broke. This allowed me to figure out the load it took to break them. Basically, any tape about doubled the force it took to break the wood samples. The bare persimmon took almost twice as much force to break as any other bare sample, so the tape didn’t help as much there. The padauk samples were more brittle, and were helped more by the tapes. The nylon tape did not stick well to the glues. Not being very stretchy it tended to come loose from the samples rather than breaking itself, and then the wood broke at somewhat less than 'average' applied force. The bias tape stuck down better with HHG than with Titebond. In some cases the Titebonded tapes also broke loose from the wood without breaking. Generally speaking the HHG tapes broke along with the wood samples, and it took more force to break them. My conclusion, then, is that HHG works better for gluing down tapes, and that bias tape, although a weaker material than nylon, adds more strength to the sides. This result probably applies well to the case of stopping cracks from propigating, but it may not say as much about added resistance to shock at the tape location. I’ve seen a lot of old instruments with either paper or cloth reinforcements glued to the insides. Generally, over time, the glue deteriorates with exposure to the air, and the paper or cloth come loose. I feel that shellacking the reinforcements should help prevent this, by excluding air and moisture. The shellac also acts as an adhesive itself, of course. We’ll know whether it works in about 75-100 years, and I’ll let the folks on this ‘board know about it if I can. :) |
|
| Author: | Mark Swanson [ Sat Oct 28, 2006 4:07 pm ] |
| Post subject: | |
Good Job, hesh. I use the tape method for a while now, I got it from Alan. I like it, and I've always used the HHG myself. Peter, I hope to see you at the meeting too! |
|
| Author: | Rod True [ Sat Oct 28, 2006 6:12 pm ] |
| Post subject: | |
So..... Is there some formula or "best" locations for the tapes. I've read sometime back that the tape should go in areas which are "straighter" than are "curved", so if a guitar shape was totally curved with little to no straight sections, would this be better? I would think that a crack doesn't care to much about the shape when it starts. |
|
| Author: | Colin S [ Sat Oct 28, 2006 8:55 pm ] |
| Post subject: | |
Hesh, I must admit I use either nothing or off-cuts of the sides at right angle rather than tape. (Just for the looks you understand). However I have a 1963 Martin 00-18 that has brown bias tape side supports and though I can't tell you if they protect the sides or not as they have no cracks, I can tell you that they are still perfectly well adhered to the sides of the guitar. At the RCM museum they have many instruments that are reinforced with paper, many lute shells have strips of paper stuck to the joins, in general it just seems to be manuscript type heavy paper, and in fact I have seen some repaired with music manuscript paper, notes included! These would have been stuck down with animal glues of course. On my lutes I use the more up-market version and use pure silk ribbon, silk has the highest weight to strength ratio of all the cloths, and was also used on early instruments. Stuck on with hide glue of course. If I use tapes on my guitars I would also use silk. Colin |
|
| Author: | Dave Anderson [ Sun Oct 29, 2006 12:59 am ] |
| Post subject: | |
Very good tutorial Hesh. I think I'll try this on my next one.It does seem to be a better way to protect your sides from cracks. Or I should say protect a crack from spreading.I'm going to use HHG though and protect the tape with shellac. Thanks man 
|
|
| Author: | KiwiCraig [ Sun Oct 29, 2006 9:57 am ] |
| Post subject: | |
Hi Hesh Looking very good so far ! I have the sister side sets and was curious as to how they bent . Would the Myrtle handle a cutaway bend ? , and what side thickness did you use ? Regards Craig Lawrence |
|
| Author: | Billy T [ Sun Oct 29, 2006 1:00 pm ] |
| Post subject: | |
I was going to say, how grateful I was, that Hesh went to all this trouble, to post on the taping, then I realized..., Hey! This Rat @^#%$$@ was only showing off his ich'in Tiger Zoot,... then I realized how grateful I was for that!!! 
Thanks Bud! I appreciate it! 
P.S. Do you have to work that neat? It gives me the creeps! 
Double P.S. What kind of rosette are you putting in your workbench? |
|
| Author: | Lillian F-W [ Sun Oct 29, 2006 1:19 pm ] |
| Post subject: | |
Yeah, I noticed that myself. Was wondering if that was his testbed, if you will. |
|
| Author: | Billy T [ Sun Oct 29, 2006 1:48 pm ] |
| Post subject: | |
[quote]If you like the rosette channel in the workbench boy do I have one to show you in the bathroom countertop....... [/quote] Actually I do like it! Considering, how methodical you approach things, I thought that you may use that, "channeling" for setup to standard sizes on purpose. Now I'm thinking why not, depth and radius would be right there? As for supports, for myself, I would pick kevlar, for obvious reasons... it's bullet proof! I don't think supports have to be over thought, they are a back up. Alan, I sure appreciate your work though! Is there something you havn't tested?
|
|
| Author: | Rod True [ Sun Oct 29, 2006 3:04 pm ] |
| Post subject: | |
So...... Still wondering if there is some sort of pattern or specific spacing for the supports, tape or otherwise. Anyone.....Anyone? Bueller.....Bueller.....Bueller? |
|
| Author: | Rod True [ Sun Oct 29, 2006 3:35 pm ] |
| Post subject: | |
Cool, thanks Hesh. So, did you get the back and top glued on today
Your so fast.
|
|
| Page 1 of 2 | All times are UTC - 5 hours |
| Powered by phpBB® Forum Software © phpBB Group http://www.phpbb.com/ |
|